Welcome to My Kind of Food. Subscribe to my blog feed or sign up for email updates. (A confirmation email will be sent to your in-box prior to activation. )If you have any issues subscribing, please contact me at hungrygal@rogers.com

Wednesday, February 25, 2009

De-Mystifying Risotto


Note: What To Do With... will return next week

Risotto. If there is a word that strikes fear in the hearts of most accomplished home cooks, it would be this word (okay, maybe also, souffle. But that's for another day.)

Who could imagine that little humble arborio rice and ladles of broth could cause so much fright. Forget teetering bain maries over a hot oven rack, jarring fiddly home-made jams, or squeezing unctuous duck confits into mason jars, risotto is what scares me. What is it that makes risotto so fearsome? If you think about it, risotto is really a simple food. Rice and hot broth stirred together lovingly with the dedication of a doting parent until it is rendered al dente with each grain still fully defined but contradictorily, swathed in it's own carbo-rich creaminess.

But I think I can explain my fear...

I grew up eating steamed white rice. Like any good Chinese mom worth her salt, my mother taught me on how to cook perfectly steamed rice. Too much water and it's mushy and gummy. Too little and it's hard and chalky. Steamed rice is fully cooked and while each grain is fully defined, they cling longingly to each other. Making steamed rice is an easy process: measure out rice, wash it until the water runs clear and add the right amount of water (Knuckle-method* or generally a proportion of 1 c rice to 2 c water.) and as Ron Popeil says, "Set it and forget it!" The rice cooker performs white rice magic.

On the other end of the spectrum, the Chinese also have congee (or jook) which is a silky, creamy brothy rice "soup." This is also easy. Measure rice, wash until clear and this time, LOTS of water (about 6 c water to 1 c rice) and slowly simmer for an hour or so. But neither of these two things are risotto's equivalent. So I had resigned myself to enjoying risotto, but only in a restaurant. Recently it dawned on me that my fear of risotto was irrational. Be afraid of baking Montreal-style bagels or making nougat (what exactly is the soft ball stage, anyway?) but not risotto.

With a couple of things to keep in mind, anyone can make a luxurious creamy risotto. The reason risotto was a "restaurant" only meal for me, was largely in part to the commitment to stirring. You can't set it on the stove, and peel onions while it cooks. Oh no, risotto demands your attention, in fact, a full twenty minutes of stirring. Yes, it's labour intensive. You have to be faithful to the task. But don't mistake labour intensive for difficult. They are not the same and in the case of risotto, it was never more true.

This Italian rice dish is one of the easiest things to make provided that you consider some principles for making the perfect risotto:

Patience: risotto needs your attention and you cannot rush the process, you will need to stir constantly to extract the creamy consistency from the rice
Top quality ingredients: Your risotto is only as good as your ingredients. Use a flavourful stock, Arborio rice, the highest quality ingredients you can afford. This is a treat.
Hot stock: a barely simmering pot of stock should sit beside your risotto pot
One ladleful at a time: don’t be tempted to rush the process by pouring a large amount of stock into your risotto, use modest amounts.
Full absorption: Again, this addresses patience, once you add the stock, slowly stir to incorporate. Wait until the stock is absorbed before adding more.

If you follow these principles, you should have a creamy and perfect risotto every time. I promise.

This risotto is fantastic. It is creamy and richly flavoured and the hint of lemon brightens this dish. Admittedly, when we make this risotto, it is a 2 person job. One of us stirs while the other makes the scallops.

Vegetarian version: try making this risotto and top with these flavourful simmered mushrooms

Lemon Chive Risotto with Seared Scallops
Serves 4 (as a main) or 8 (as an appetizer)


2 c Arborio rice
1.5 to 1.75 liters of simmering chicken broth
2 tbsp butter
2 garlic cloves, finely minced
¼ tsp salt

1 ½ preserved lemons, seeds removed and finely diced**
approximately 3-4 tbsp finely snipped chives
1 tbsp crème fraiche

Scallops
8 large sea scallops (or 16 smaller scallops)
2 tbsp butter
1 tbsp olive oil

1. On a paper towel, dry sea scallops. Sprinkle with salt and pepper. Set aside.
2. Heat a medium size pot. Add butter and toss in garlic. Stir. Do not allow the garlic to brown. Turn down heat if necessary. Add Arborio rice. Stir until the rice is coated and glossy.
3. Add chicken stock 1/2c at a time. Stir constantly. When the liquid is absorbed, add another 1/2c. Do not rush this process. It should take approximately 20 minutes. The rice is ready when the rice is creamy and soft but each grain intact. Each grain of rice should have a starchy center.
4. Meanwhile, heat a frypan. Add butter and olive oil. Once it starts to smoke, add scallops. The scallops should sizzle and develop a rich dark brown crust. Within a minute, turn each scallop over and turn off heat. (Do not over cook scallops.)
5. Remove risotto from heat, stir in crème fraiche and chives.
6. Serve risotto with scallops on top.

*Knuckle-method for cooking rice in a rice cooker - once you have rinsed out the rice. Add enough water, so that your middle knuckle rises out of the water while all other knuckles are submerged. Chef Ming Tsai calls this the Mount Fuji method, for obvious reasons.

**If you don’t have preserved lemon, I would stir in the zest of 1 or 2 lemons and a little squeeze of lemon juice just as you add the crème fraiche and chives.

...Read more

Saturday, February 21, 2009

A Simple Brunch Menu: Simmered Mushrooms with Poached Eggs


One of the things I look forward to on the weekend is enjoying brunch with my husband. Our morning starts predictably with the sound of the coffee-maker pulverizing aromatic dark roasted coffee beans, my husband unfurls the weekend newspaper to glance at the front-page headlines then, we set about making brunch together. Some weekends, we want something sweet and fruity like blueberry pancakes topped with Quebec maple syrup. Other times, we prefer something savoury like a traditional English breakfast.

Eggs seem to be a necessary staple of our weekend ritual. I love them because they are utterly versatile and are absolutely delicious in so many ways: hard-boiled, soft-boiled, scrambled, sunny side up, over easy, poached, coddled, baked, salted, pickled, souffled, and meringued. (Although, not sure pickled eggs is something I'd want for breakfast...)

Usually, I have my eggs overeasy with an oozing, dribbling egg yolk that I sop up with a warm crisp multi-grain toast soldier. It is the simplest and quickest way to cook an egg properly. However, truth be known, my favourite egg is one that is gently poached: a rich golden yolk gently cradled by the tender egg white. A thick slice of smoked salmon and a spoonful of hollandaise and I am over the moon. It's a perfect way to start the day. I don't have a poached egg as often as I would like but when I do, I usually resolve myself to having it again soon.

I was flipping through an old issue of Gourmet magazine when inspiration struck me. There in its glossy pages, I saw two quivering poached eggs resting upon a plate full of roasted mushrooms, and I thought, “Now that would make an excellent brunch item.”

I had a small amount of chicken broth leftover, and I thought about slowly simmering the mushrooms. This is what I came up with...


Poached Eggs over Simmered Mushrooms
1 tbsp vegetable oil
3 garlic cloves, minced
1 lb assorted mushrooms – cleaned, sliced into thick slices (shitake, button, cremini, oyster, morel)
1/2c chicken broth
¼ tsp chilli flakes
¼ tsp herbes de province

4 eggs
1 tbsp white vinegar

2 tbsp snipped chives
truffle oil

1. Heat vegetable oil in large pan. Add minced garlic and sauté until softened.
2. Add mushrooms and broth and simmer until the mushrooms reduce in size and the broth is thickened. This should take approximately 20-25 minutes.
3. Once mushrooms are almost ready, heat a separate shallow pan with water. Add 1 tbsp of vinegar to the water. (Before you add the eggs to the water, ensure you have a slotted spoon and your serving dish closeby.) When water begins to simmer, crack one eggs into a shallow dish. Carefully and slowly tip the egg into the barely simmering water. Repeat with the remaining eggs.
4. There should be enough water to fully cover the egg. Do not allow the pan to come to a boil. The water should continue to simmer and the whites of the eggs should start to take shape. The yolk will be extremely fragile and wobbly. It should probably take about 2 minutes.
5. Tumble mushrooms into a serving dish, and with the slotted spoon, carefully spoon the poached eggs out of the water and slide onto the mushrooms. Dust with chives and drizzle with truffle oil.
6. Serve immediately.


...Read more

Wednesday, February 18, 2009

What To Do With…. Egg Yolks

I know that I am not the only one who has been in this situation: You've found a great recipe but it only requires part of the egg. You need the yolks but not the whites, or you need the whites but not the yolks. So what becomes of the unwanted half? You could throw them away or you could find a simple recipe to make use of them....

In my survey of one (me), I have found that it is infinitely easier to find a delicious end for those egg whites. One could easily whip them up into a tall fluffy meringue or a 2 minute egg white omelet. But yolks? Hmm... Who has a yolk omelet?

This weekend, I made macaroons from a recipe that required three egg whites but that left me with three orphaned egg yolks. Of course, there are delicious uses for orphaned egg yolks such as a buttery hollandaise or a creamy custard base for a delicious salted caramel ice cream. But neither of those options appealed to me because they created more work rather than solved my immediate culinary dilemma.(Just because I love to cook and enjoy the time I spend in my kitchen doesn't mean I want to spend all weekend there. Hence, the temptation to throw orphaned yolks out.)

To be honest, I wasn’t sure what I wanted to do with them until I peered into my fridge and I found my answer in the crisper...

This recipe involves juicing the lemon/lime and takes about 10 minutes of whisking and that's it. You don't need to use it immediately, but it should probably be eaten within a week.


Lemon-Lime Curd

1 lemon juiced
1 lime juiced
3 egg yolks (you may need another yolk if you need to have a thicker curd)
6-8 tbsp sugar (separated) or more to taste (if you prefer a sweeter curd, add ½c to ¾c sugar)
4 tbsp butter, separated

1. Over a pot of boiling water, set a metal mixing bowl over top. Pour the juice into the bowl, add yolks and whisk continuously. Add sugar tablespoon by tablespoon, if you like it abit tart. Check for sweetness. Add as much or as little based on your preference.
2. Add butter 1 tbsp at a time. Whisk until well incorporated.
3. Lemon curd should be thick enough to coat the back of a wooden spoon.
4. Pour into a clean container and refrigerate.

Lemon curd may be smeared on scones, or toast. Alternatively, lemon curd may be used in desserts.

...Read more

Sunday, February 15, 2009

Thai Seafood Soup


I never liked Thai food until I went to Thailand. The Thai food I had eaten before my travels was a transgression against the cuisine: insipid oily noodles stirred with ketchup and finished with a dusting of crushed peanuts. Backpacking throughout Asia, however, changed the definition of Thai food for me. During my soujourn, I ate a lot of street food, the ground zero of authentic cuisine in Asia.

I remember my first night in Bangkok in the backpack mecca, Khao San. It’s a small steamy neighbourhood that attracts the budget traveler and the curious. The streets pulse into the night with hypnotic beats of trance music, and burst with locals and weary travellers who descend upon Khao San for a little excitement and if time permits, for a little down time. I was mesmerized by the sights, sounds, and smells of the neighbourhood including the street vendors who serve pad thai fresh from their carts.


Through my travels, I have found that the best authentic foods may be found amongst the locals. Food created on the streets, away from the tourist-friendly restaurants, that cater to local preferences and not adapted or muted for Western palates. Thailand is no exception. Imagine the street chef throwing lashings of oil that sizzle in the hot wok and crescendo into a fragrant smoky cloud. He tosses in a ladleful of wet rice noodles, then add a dash of nam pla (fish sauce), tamarind, and a spoonful each of chilli and sugar for good measure. He tosses it about until the flavours come together in harmony. Then the adept street chef reaches for an egg and with a quick flick of the wrist, the noodles have been pushed aside and the egg sizzles and sputters at the bottom of the wok. Chop, chop and he mixes bits of scrambled egg with the rice noodles. Now the dish is finished with a handful of bean sprouts and cilantro. The vendor scoops out the noodles into a small paper dish with a sprinkle of crushed peanuts and a little nub of lime on the side. That’s pad thai in Thailand. It is neither heavy nor red. Authentic pad thai is light, tangy, crunchy, and chewy.

Several years ago, I had an opportunity to go back to Thailand and this time visiting Chiang Mai was my number one priority. I had read about the abundance of artisans, the beautiful architecture of the inner city and the wide selection of cooking schools. Located in the northern part of the country, it is far from the conjested swollen streets of Bangkok. Chiang Mai is a temperate, lush and friendly city with a robust night market scene. On a nightly basis, families and friends gather in the city’s various markets for a little dinner, a little shopping and a lot of laughter. Most night markets have an area dedicated to food, like an open-air food court. Individually, they don’t have an extensive menu, and you often have to source your meal from several vendors. Some vendors only sell drinks, while others specialize in seafood, and others in dessert. This gives you an opportunity to walk around, see what’s fresh and try something new. With an open mind, eating in Chiang Mai or Thailand for that matter, is a very rewarding experience.


One of my favourite selections from the night market is Tom Yum soup. Just one taste reminds me of those long breezy nights in Chiang Mai. Tom Yum is not shy or delicate. It’s bold and complex: fiery heat from the chilis, tangy sweetness from the tamarind, and a broth that is deeply infused with the exotic fragrances of lime leaves and lemongrass. In my version of this Thai soup, I toned down the heat a smidge and added slippery vermicelli noodles to make this into a belly warming supper that is highly slurpable and suitable for all.


Thai Seafood Soup
Serves 4


To slice the chicken thinly, I use a frozen chicken breast. Let it partially defrost so that it is firm but easy to slice through with a sharp knife

1 l of chicken stock + 2 c of water
1 lemongrass stalk, cut into 3” segments, bruised
2 lime leaves
1 inch slice of ginger, bruised
2 tbsp nam pla (fish sauce)
8 mushrooms (straw mushrooms, white button, shitake, enoki)
handful of cilantro (cut away stems from the leaves, reserve stems)

1 chicken breast, partially frozen
16 large shrimp (peeled, shells reserved)
½ package of rice noodles, softened in warm water

to garnish:
8 cherry tomatoes, quartered
lime slice
fried shallots*

1. To make the soup, simmer chicken broth, water, lemongrass, lime leaves, ginger, fish sauce, shrimp shells, and cilantro stems for approximately 20 minutes. Strain away solids.
2. Bring stock to a boil again.
3. Meanwhile, heat noodles in a separate pot. Heat the noodles until they are soft and slippery.
4. Add chicken pieces. Stir around to ensure it doesn’t stick to the bottom and pieces stay separate. Once the chicken changes from pink to white, add shrimp. Allow it to come up to a simmer again, and the shrimp tails curl. Turn off heat.
5. Strain the noodles and add to a soup bowl.
6. Pour broth, chicken pieces and shrimp over the noodles.
7. Garnish with cherry tomatoes, lime and fried shallots*

*Fried shallots or onions can be found at any Asian grocery store. Absolutely optional but creates an interesting contrast in texture from the soup.

...Read more

Thursday, February 12, 2009

What To Do With... Avocado


There are few foods that rival the utter joy of diving into a buttery, creamy avocado. It is both sinful (oh those calories...) and sublime. It is a study in contradictions in nature being both fruit and fat.

The ripe avocado is a bit of a diva. To enjoy one, it requires a little forethought and planning. Usually sold rock hard and too unripe to eat immediately, the avocado must be coaxed into ripening by sitting at room temperature on your kitchen counter for at least a day or two. An avocado at its peak, is utterly brilliant, but forget about it for an extra day or two and the avocado fades into a squishy, unpleasant mess. Even at its peak, this diva doesn’t travel well (she's a fragile little thing) and once exposed to air quickly turn an unappetizing brown. This diva waits for no one.

How do you know when an avocado is ripe?

Give it the slightest squeeze and if the flesh underneath the skin yields, it's ready to eat.

How to cut an avocado (safely)

To reveal an avocado’s fruit, work your way around the avocado with a sharp knife, its globe-like pit marks its center as illustrated below:


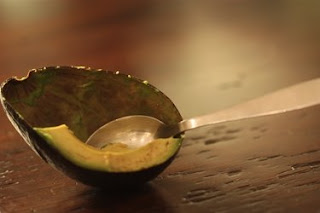
Once you have made your way around the avocado once, twist and gently pull apart one half from the other. Its bright yellow flesh is revealed. A ripe avocado is yielding but not mushy and mellow yellow that fades into a pale green the close you get to the skin. To remove the pit, lean your sharp knife into the pit, until the knife is wedged into it. Twist your knife slightly, and the pit should pop right out:


To cut the avocado into pieces, run your knife across the avocado in length wise, then cross-wise. To remove, take a large spoon and scoop out the flesh out:


Prepare an avocado only as you need it... It's beautiful yellow and green flesh quickly gives way to an unappetizing though edible brown.

Outside of guacamole, here is one thing I that really like to do with avocado:


Avocado milkshake: Perhaps it may seem unusual to see something normally associated with savoury food served as a sweet. But this is quite popular in Asia and your local Vietnamese restaurant probably has one on the menu. (I drank plenty of these while backpacking through Asia and there are few things as refreshing as that cold, creamy, green milkshake.) It is easily one of my favourite things to sip on in the summer. If you open your mind to trying it, I guarantee you won't be disappointed. It's velvety, creamy, sweet and distinctly avocado.

Traditionally avocado milkshakes are made with condensed milk. To make it with ingredients you already have on hand at home, take: 1 ripe avocado, 1.5 c milk, 1 tsp vanilla extract. Add ice if you like it extra cold (reduce the milk.) Blend until smooth. Add additional milk to loosen, if necessary. Serve immediately. If you really want to do it local style, consider a shot of espresso (or Vietnamese coffee if you can get your hands on it.) This drink is really quite special.
...Read more

Sunday, February 8, 2009

Ten Minute Dulce de Leche Pudding

Daydreaming leads to distractions...


We invited friends over for dinner this weekend and I had planned to make these lovely dulce de leche pots de crème. The recipe involved heating, whisking, straining a custard then delivering it to a gentle bath in a warm oven followed by some cool down time in the fridge. Alas, weekends are too short and the first day of our weekend was warm. We found ourselves lingering over brunch with good friends we hadn’t seen in a while and strolled along our merry way, popping into local shops for a little bit of this and little bit of that for our dinner. By the time we got home, I realized my carefree strolling had cost us several hours… So instead of making this slightly laborious little custard which is absolutely worth it on any other given day, I decided to present the same flavour in its simplified, ten-minute version.

While my husband loves gooey chocolately things, I’ve always held a preference for wobbly delicate custards and puddings. If time permitted, calories weren’t a consideration and desserts were left entirely up to me, we would slip into crème brulees, pots de crèmes, panna cottas and my absolute favourite, Iles Flottantes (a heavenly convergence of custard and poached meringue) nightly. The combination of cream, milk, sugar, eggs whisked over gentle heat transform into a quivering, velvety smooth, creamy sweet ending to a meal. Bliss.

I had thought about making a butterscotch pudding but we had some lovely dulce de leche in our fridge and I will take any excuse to eat it. Dulce de Leche is Argentina’s gift to the culinary world: a slowly simmered mixture of milk and sugar stirred lovingly until it develops into thick golden, caramel spread. While it is great on toast, it is even better here.

Although this pudding takes no more than ten minutes of cooking time, it is so flavourful and light that you’re hardly miss that pot de crème.

Dulce de Leche Pudding

1c heavy cream
2c whole milk
6 tbsp dark brown sugar
3 tbsp dulce de leche
3 tbsp cornstarch
1 tsp vanilla
2 tbsp butter

icing sugar
toasted almond slivers/flakes

1. Add cream, 1 1/2c of milk, and brown sugar to a heavy saucepan. Whisk over medium-heat.
2. Bring to a slight boil, turn down to low. Whisk in the dulce de leche.
3. Mix cornstarch with remaining milk until smooth. Pour cornstarch slurry into the pudding.
4. Turn up the heat slightly. Continue to whisk well.
5. Once it thickens, remove off heat immediately and pour in vanilla and butter and whisk until fully incorporated.
6. Working quickly, ladle pudding into ramekins or cups and cover loosely with cling film so the heat can still escape. Once cool, fit the cling film tightly over the ramekins and refrigerate until ready to serve.
7. To serve, top with whipped cream slightly sweetened with vanilla and icing sugar and toasted almonds.

...Read more
LinkWithin Related Stories Widget for Blogs